
Add a network drive to File Explorer
- Open up file explore and click drop down for "Map network drive" and click the option Map Network drive
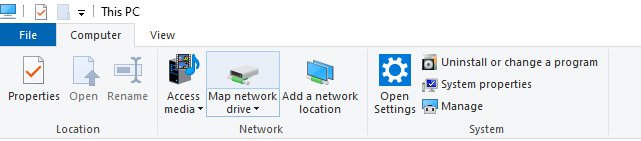
-The screen will show up as below
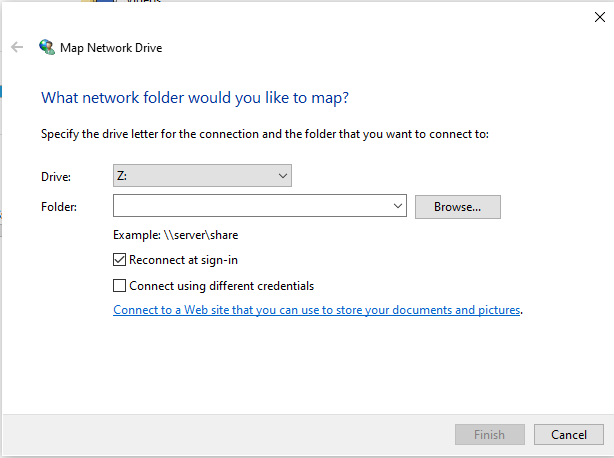
-Next choose the Drive letter and under folder place the drive location
Here are the options commonly used
J: \\ucdenver.pvt\SOM\CLINIM\HLAOnly
N: \\data.ucdenver.pvt\dept\SOM\CLINIM\ClinimInd
- Make sure you are added by IT in active directory to these two groups:
- ClinimClinimind-FSC
- ClinimClinimind-MSC
- and other ClinimClinimind-[xxx] versions
O: \\ucdenver.pvt\SOM\CLINIM\HLAConf
P: \\ucdenver.pvt\SOM\CLINIM\CBB
S: \\ucdenver.pvt\SOM\
V: \\PCLINIMDB836\ViewlincRpts
X: \\PCLINIMFS1058\HLA
Y: \\PCLINIMFS1058\CBB
Z: \\CLIN-BN8FC\Omixon
U: \\10.19.102.17\Omixon
Remove a network drive to File Explorer
- Open up file explore and go to "This PC"
- Right click the network drive you want to remove
- Select "Disconnect"
- The drive will be removed, all files you are working on will no longer save to that drive. Make sure you saved and closed out of those files before disconnecting. If not the file data will be lost